
Installation Guide
Installed in 15 minutes.
Every step, photographed on a real car. No drilling, no specialist tools, fully reversible.
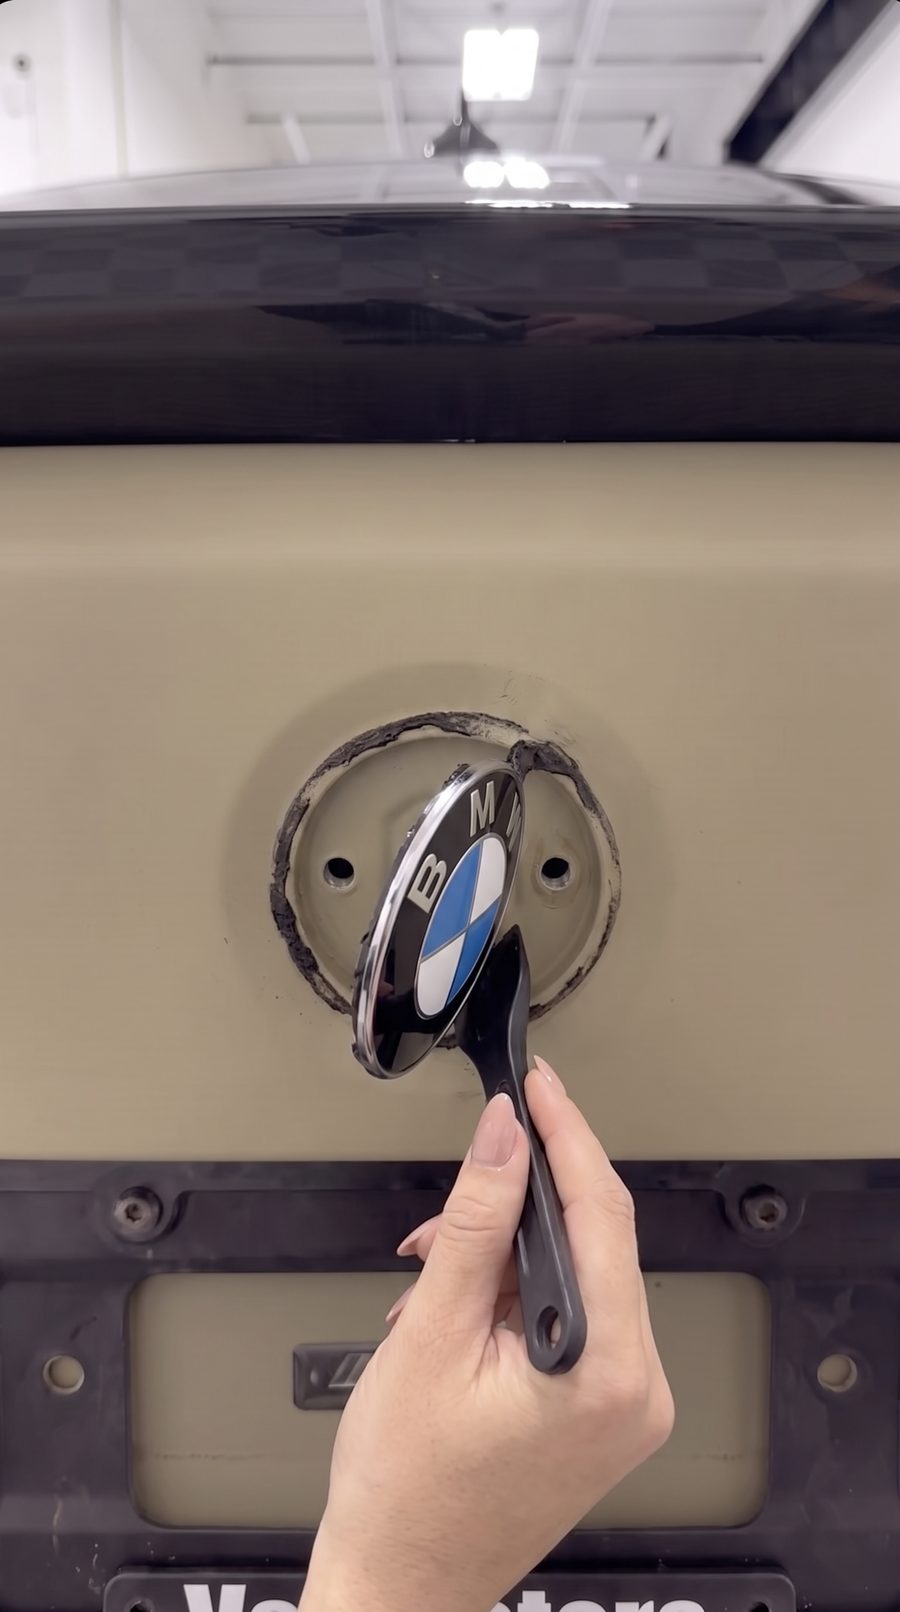
Pry off the roundel
Warm the badge for a minute with a hair dryer, then work a plastic trim tool behind the edge and ease it off. It's held by two pins in rubber grommets plus a ring of factory adhesive.
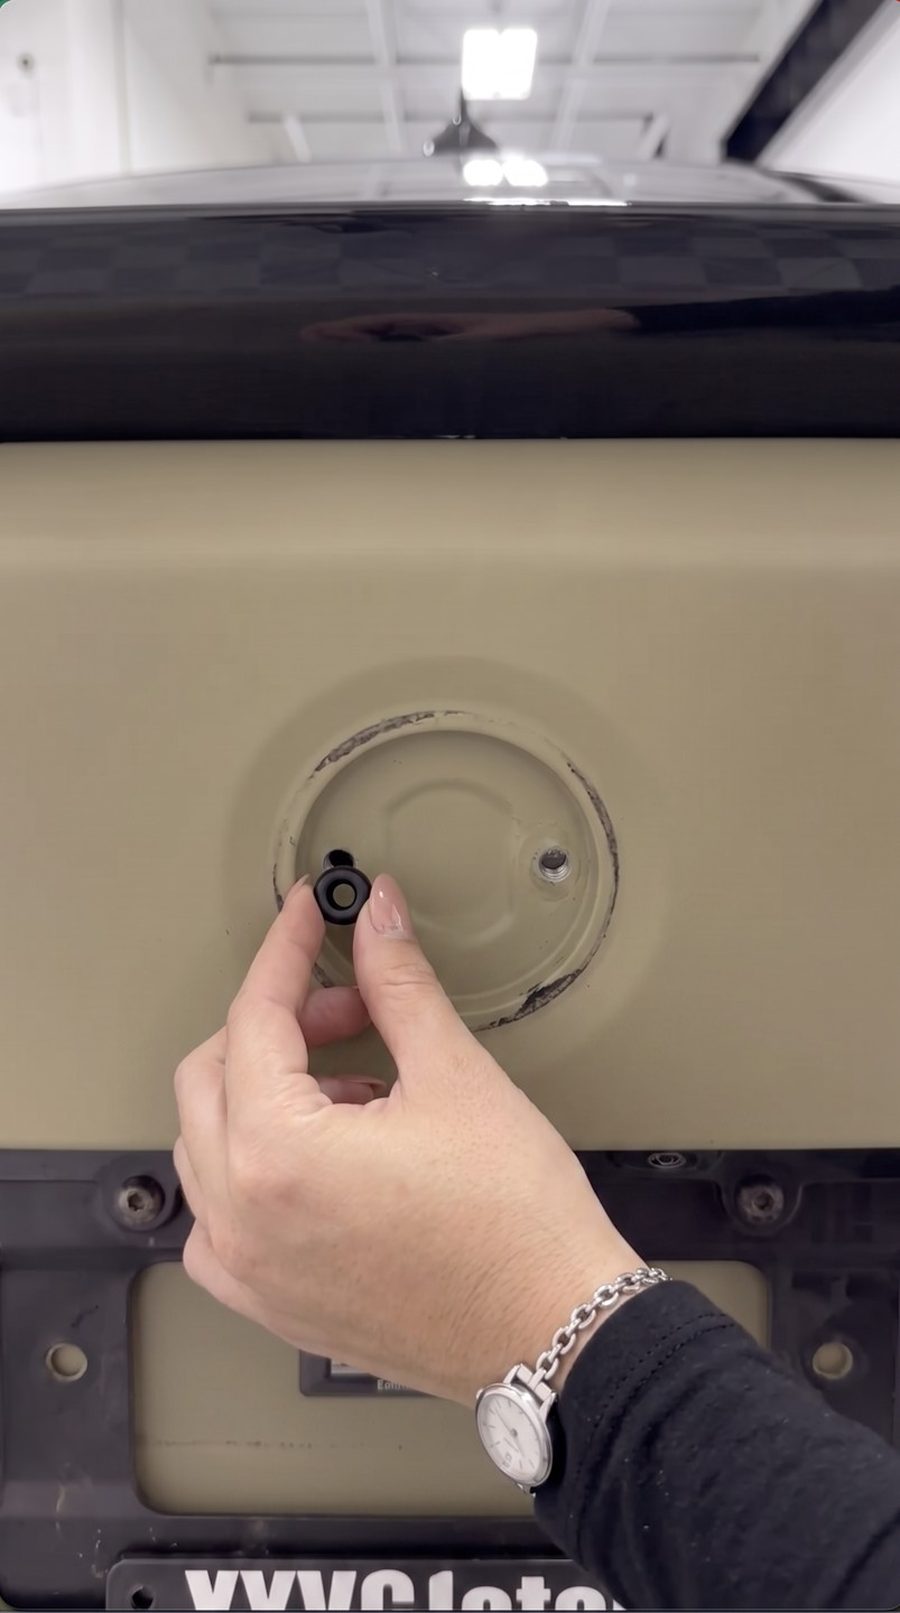
Pop out the grommets
Behind the badge you'll find the two factory pin holes. Pull the old rubber grommets out — HALO routes its wiring straight through these holes, so nothing gets drilled.
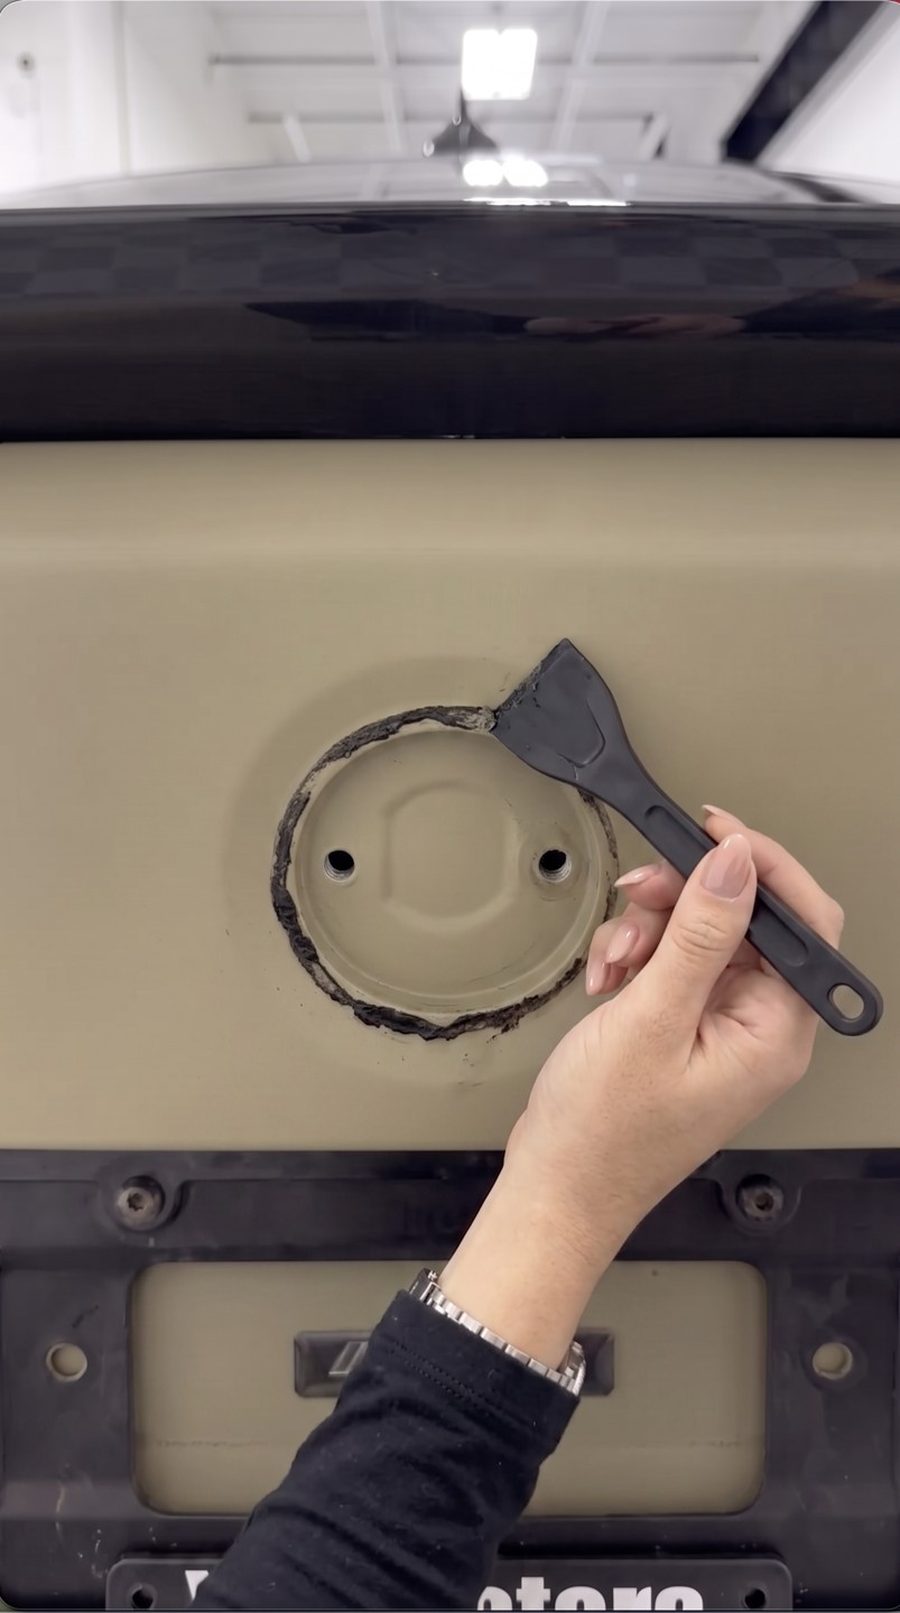
Clean the recess
Dissolve the leftover adhesive with remover, then finish with an alcohol wipe. You want the recess perfectly smooth and oil-free before mounting.
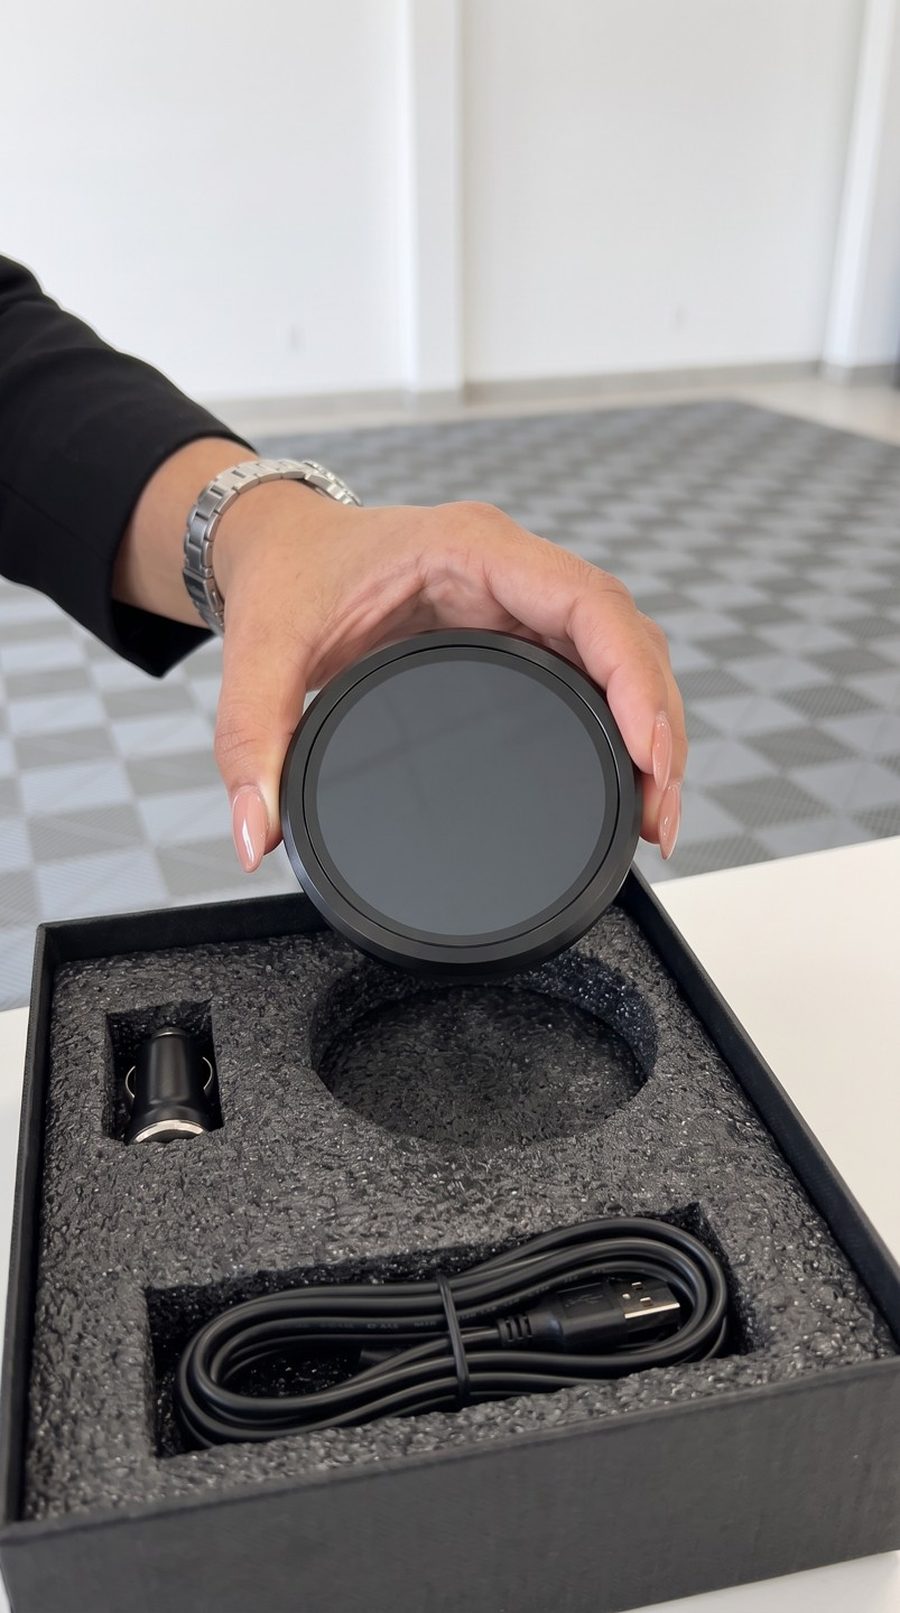
Unbox
Inside the box: the HALO unit, 12V plug, routing cable and mounting hardware. Everything you need — no extra parts run.
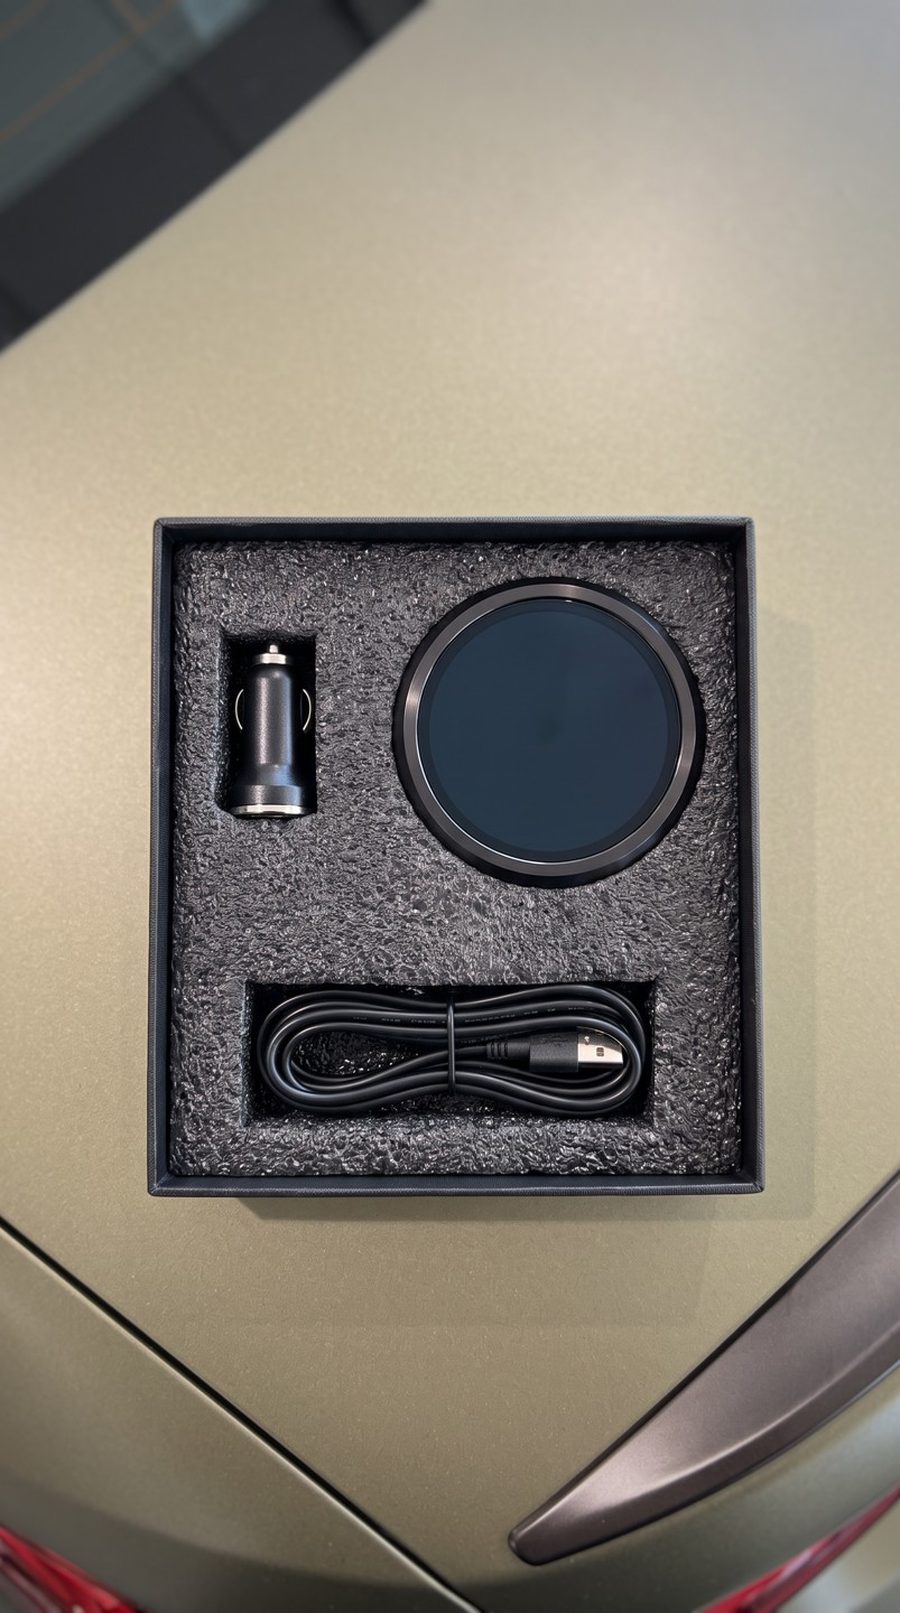
Lift it out
Take a second with it. The bezel is CNC-machined, the glass is sealed to IP69 — it should feel like a factory part, because that's the standard it's built to.
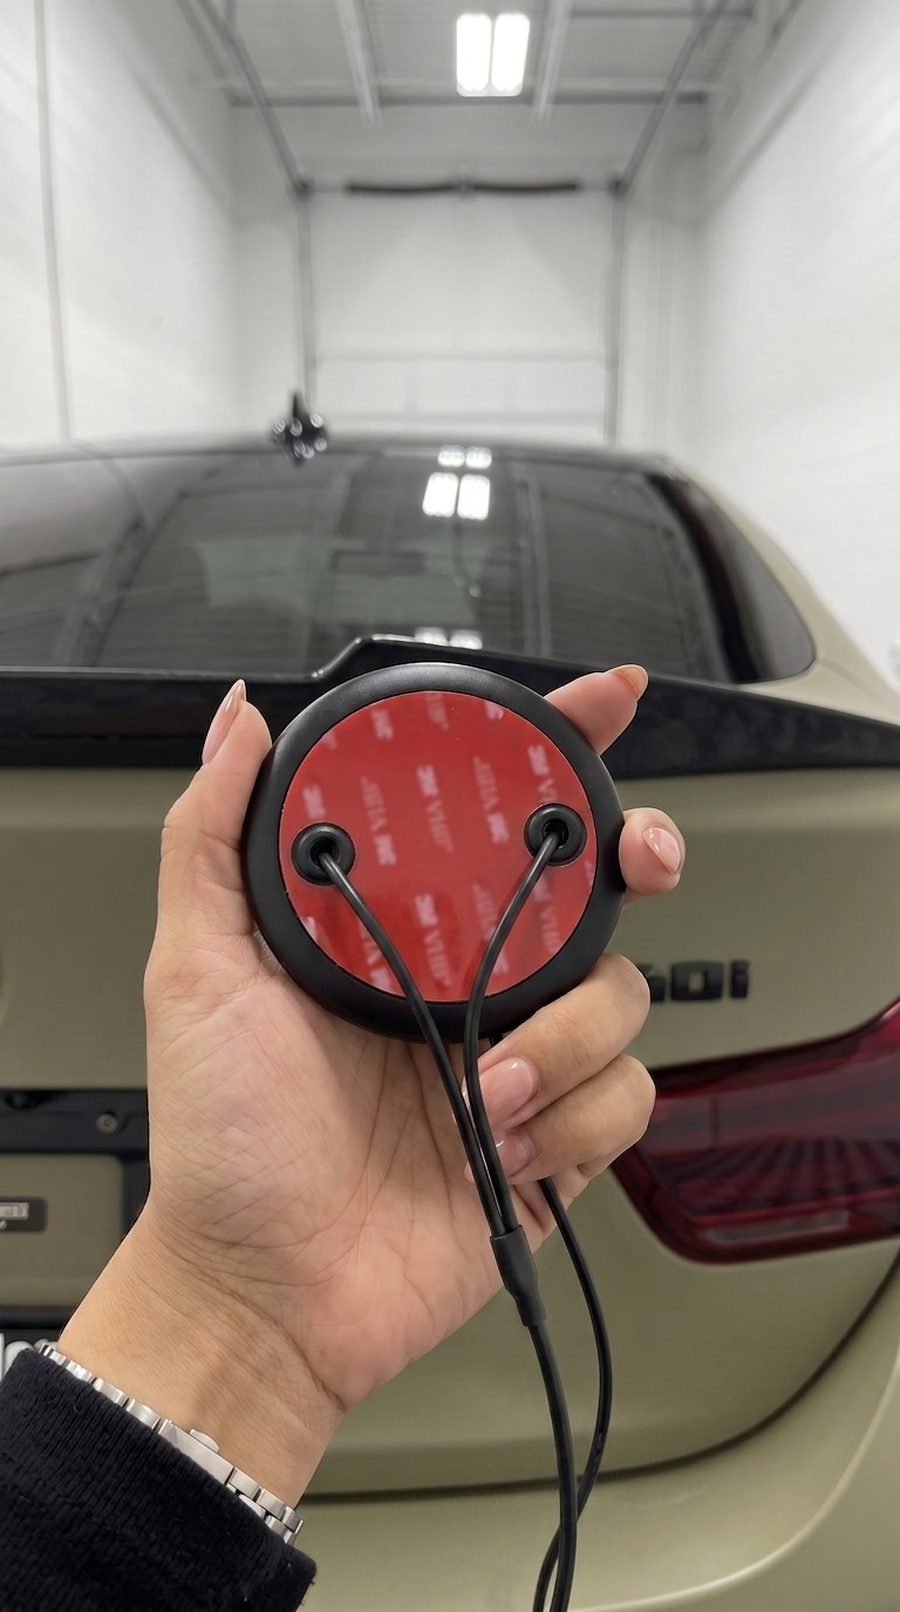
Flip it over
On the back: the power connector and mounting points, positioned to line up with the factory pin holes you just cleared.
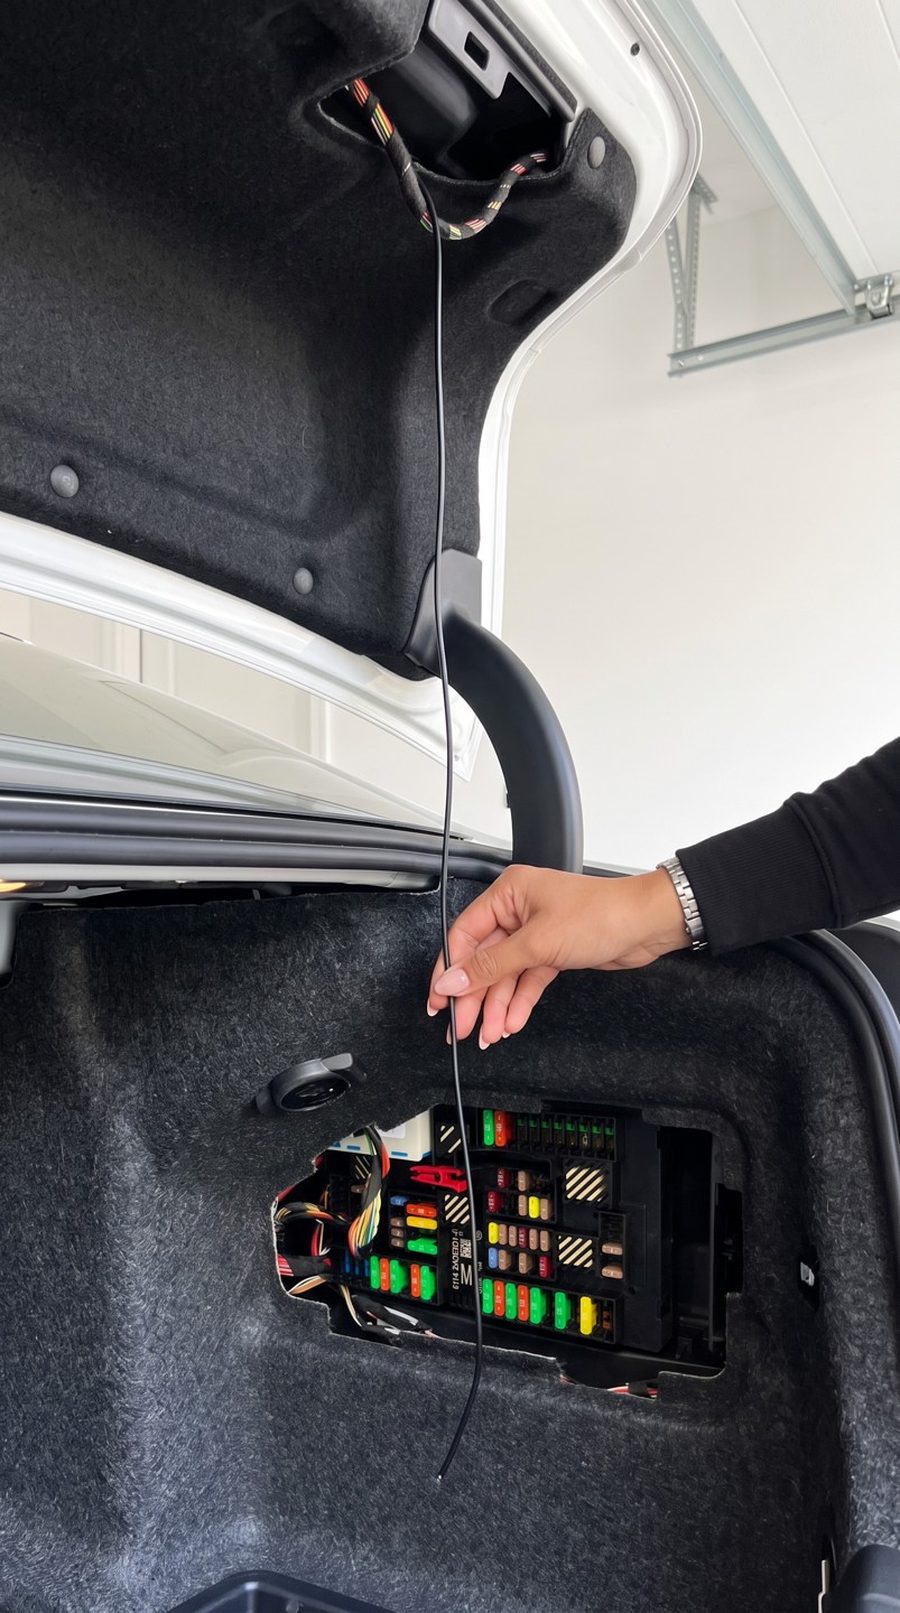
Route the cable
Feed the cable through a factory pin hole and into the trunk cavity. It follows the trunk lining down the side — invisible once the lining sits back.
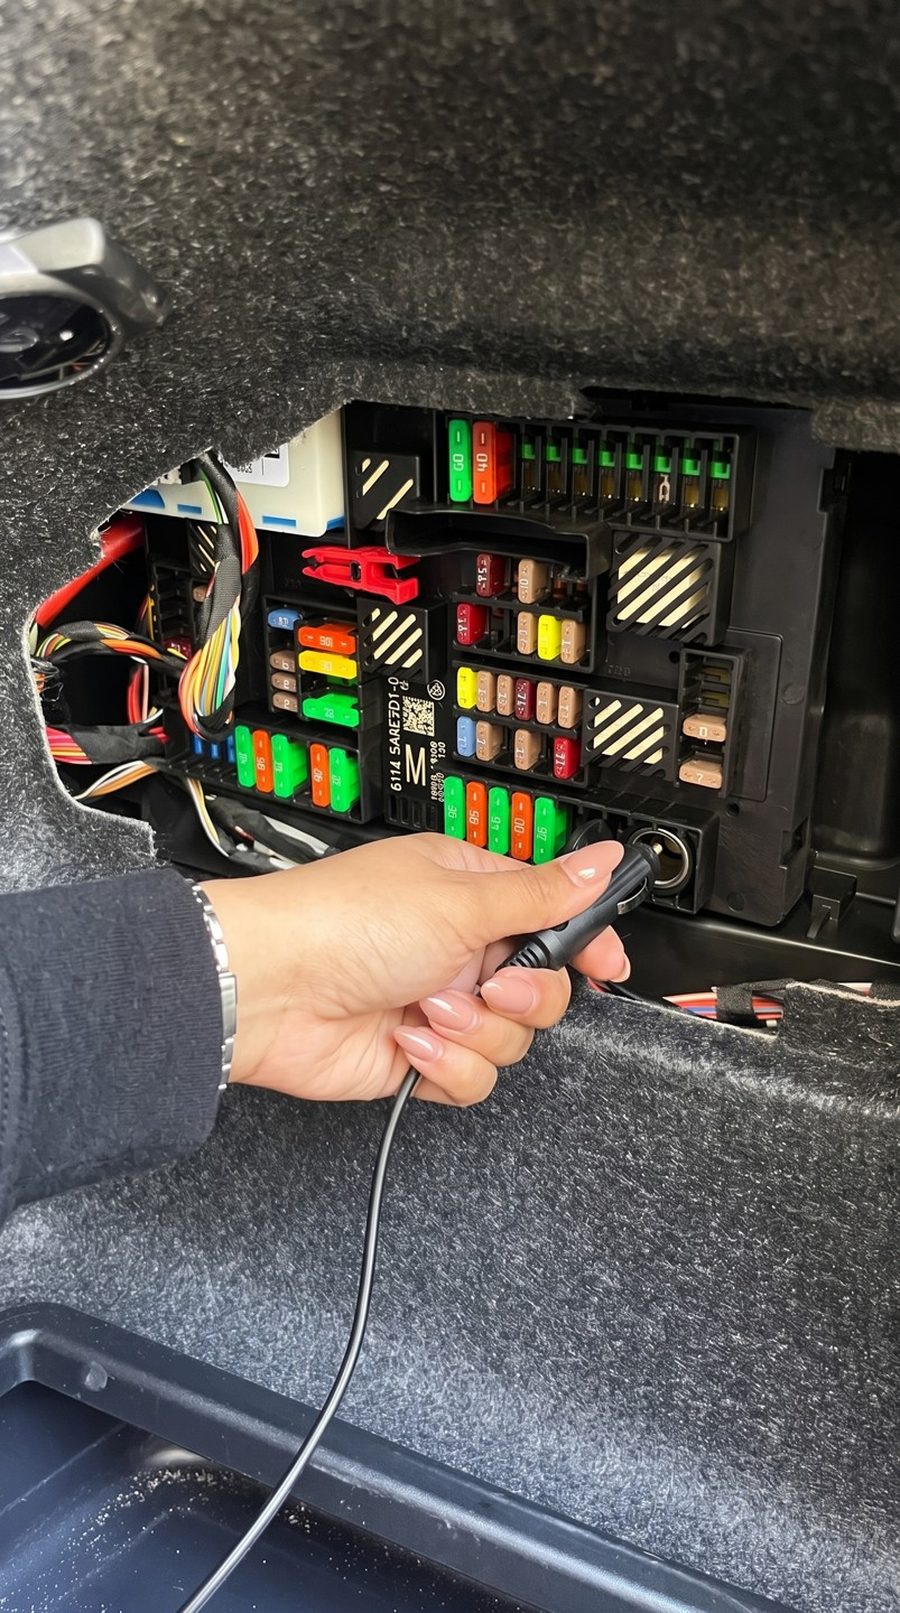
Plug into 12V
Connect to the trunk 12V socket — done. Prefer fully hidden power? Direct-wire to the fuse box with the included leads instead.
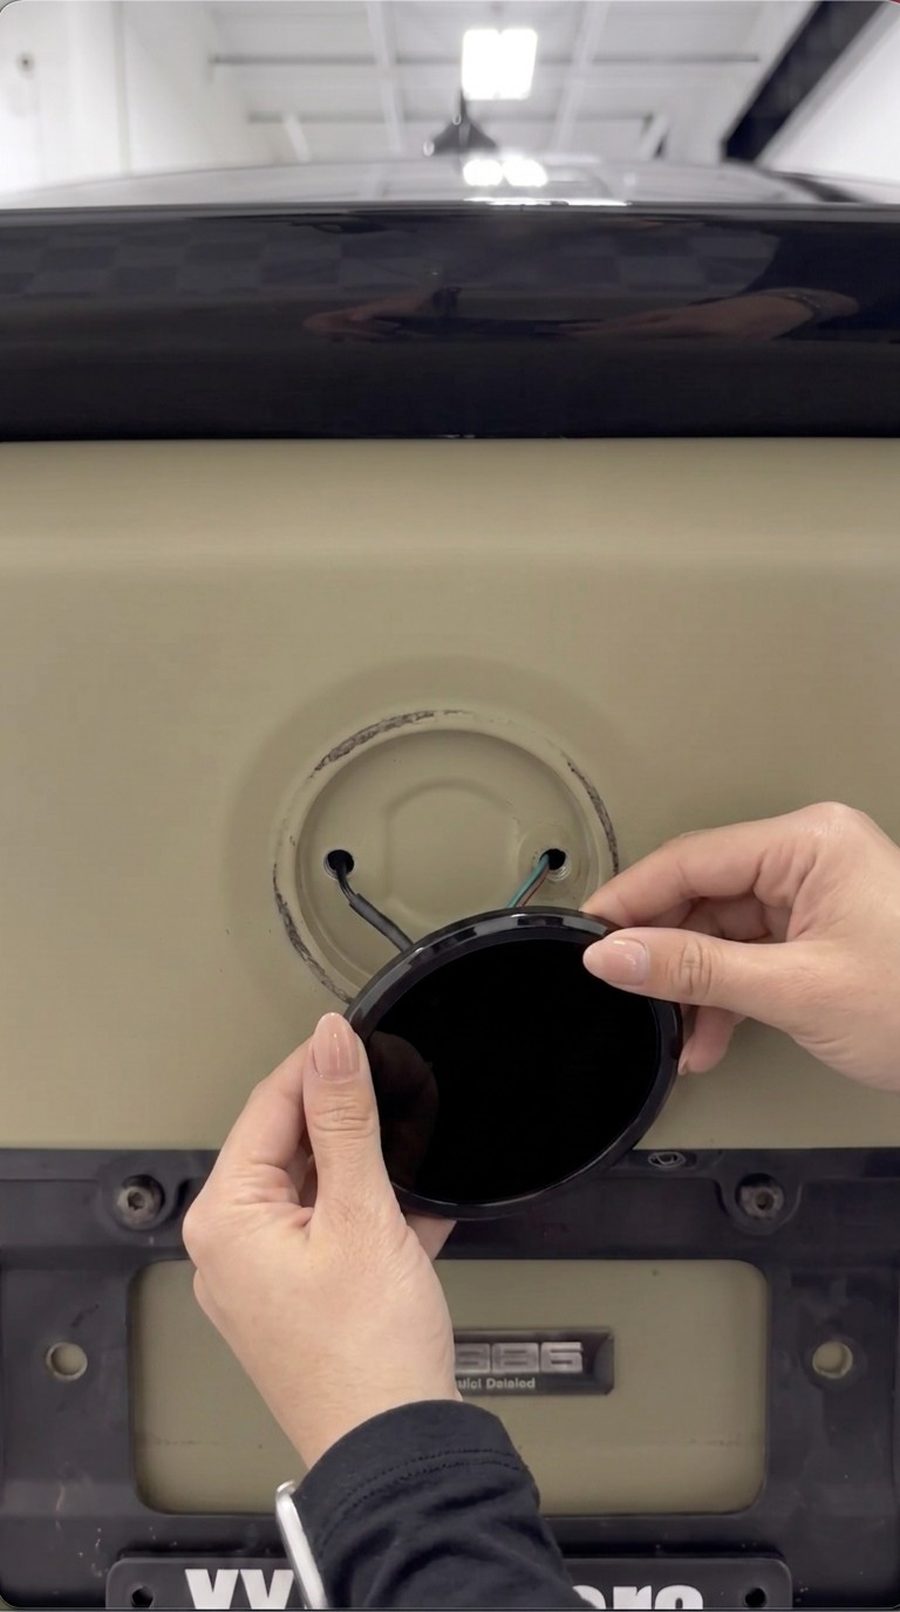
Mount & press
Line HALO up with the recess, press firmly and evenly for 30 seconds. The mounting ring and automotive adhesive lock it flush — under 15mm proud.
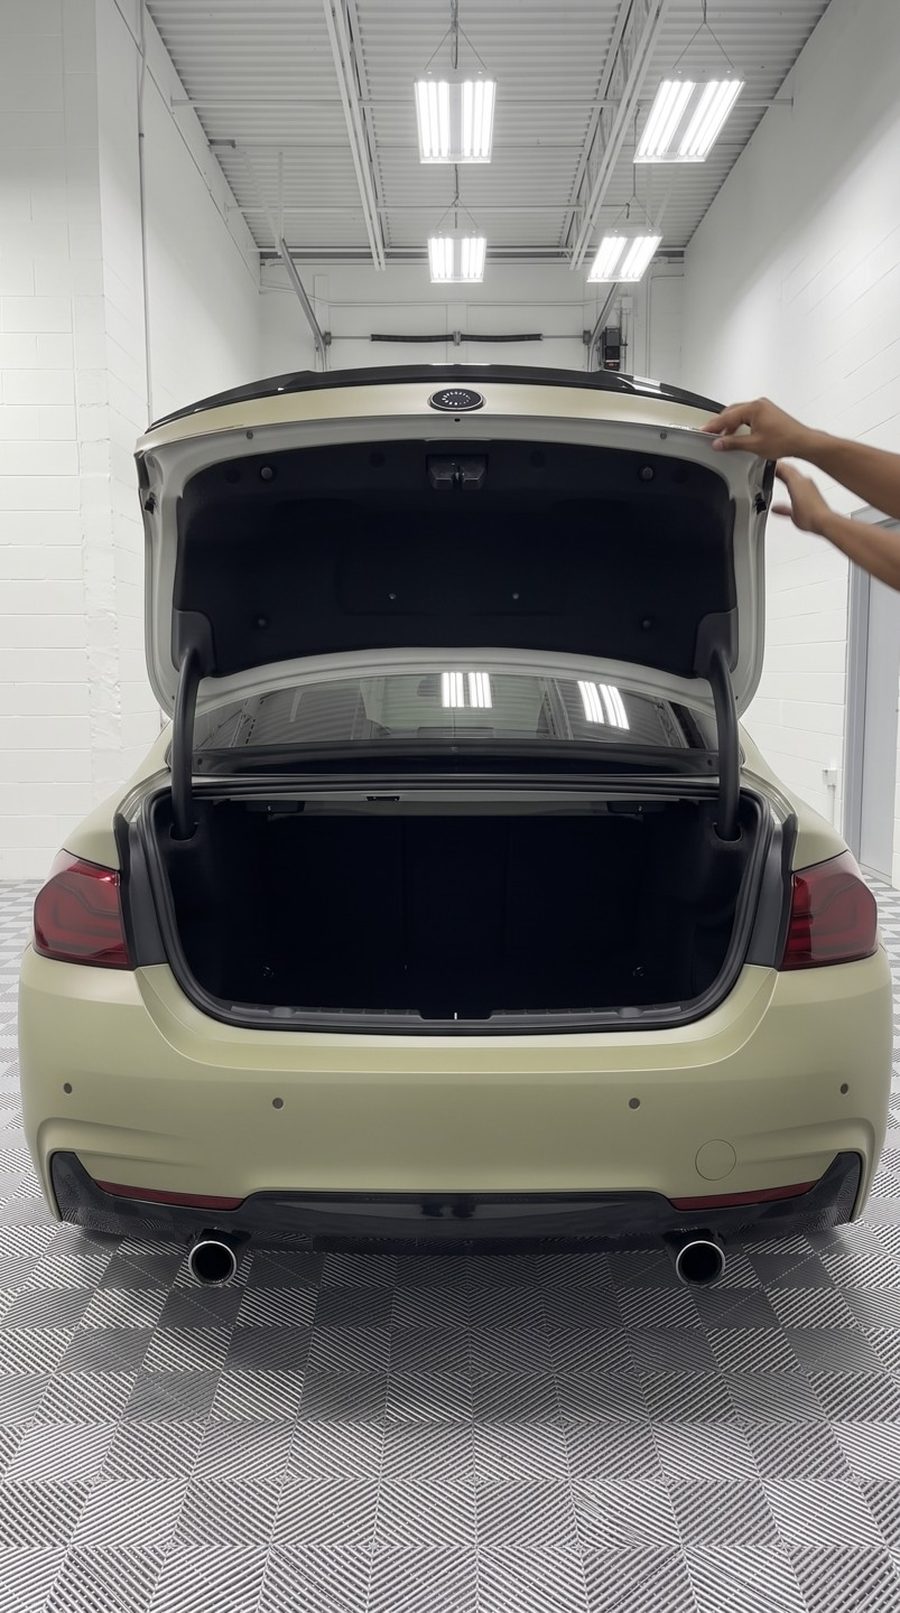
Close the trunk
Lining back in place, trunk closed. From the outside it reads factory — until you switch it on.
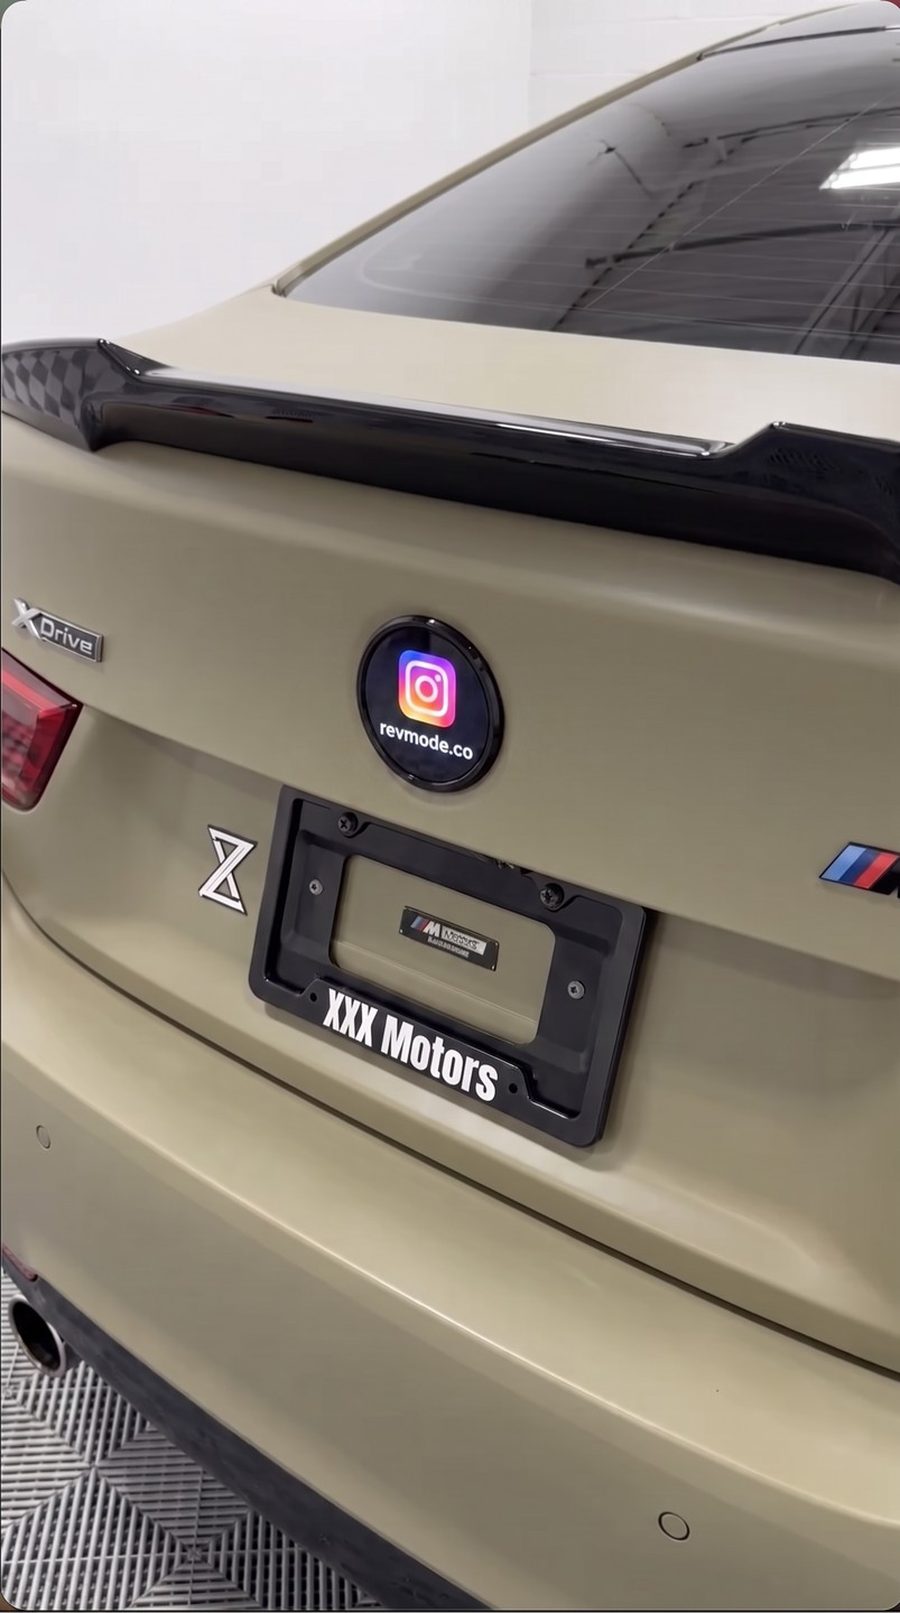
Switch your mode
Open the web panel on your phone — HALO connects over Wi-Fi, no app to install. Pick a mode: videos & GIFs, image, or brightness. That's the whole install.
That's it.
About 15 minutes, zero drilling, fully reversible. Batch 02 ships late August 2026 — cancel anytime before it ships.
Pre-order HALO — $189.99 →